Using Local Adjustments to Enhance Photos in Lightroom 3
Most of the time shooting outdoors and shooting without artificial lighting can be really hard. There may be times when the sun’s too harsh giving your photos strong shadows and there are times when the photos look flat and boring. There are times when we face the dilemma of having an overexposed background so the foreground looks properly exposed, or having a properly exposed background but an underexposed foreground. This is where post processing comes in. In the Develop section of Lightroom users can modify the Exposure, Colors and Tone of the entire photo. But what if you don’t want to make changes to the entire photo? If you want to make changes in a specific area in the photo you might want to use the Adjustment Brush tool and the Graduated Filter tool in Lightroom.
The Adjustment Brush tool will let you apply changes in Exposure, Brightness, Sharpness, Clarity, Color, and tone by brushing or painting on to the photo, while the Graduated Filter tool lets you do these changes gradually across the section of the photo.
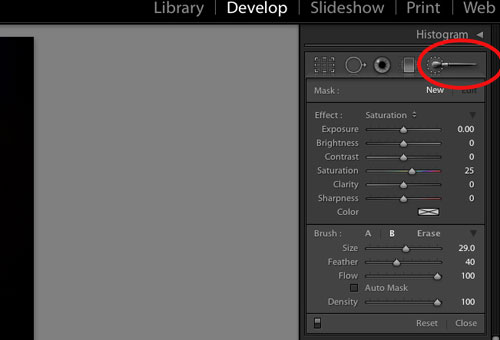
Applying adjustments and using the Adjustment brush tool and the Graduated Filter tool is pretty easy, but you must be careful not to make the photo look too edited or too fake. To use the Adjustment brush tool you can click the Brush Icon at the upper right part of your Lightroom workspace. The shortcut key for the Adjustment Brush tool is K.
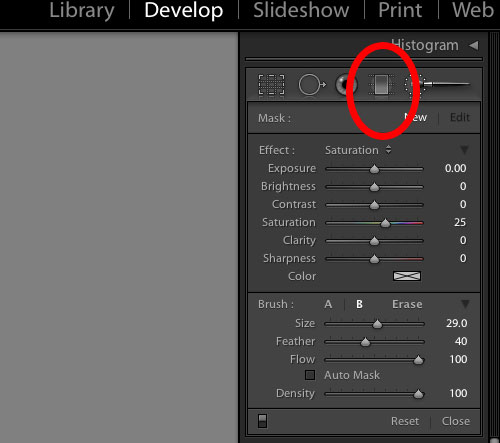
The Graduated Filter icon can be found next to the Adjustment Brush icon. The shortcut key for the Graduated Filter tool is M.
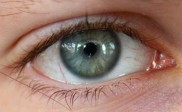
Then you can select the Adjustment type you need for your photo. If you’re going to use the Adjustment brush tool you can choose and use several adjustment presets like Whiten Teeth, Dodge, Burn, Iris Enhance and Soften Skin. If you don’t see these presets go to Lightroom > Preferences > Presets and then click Restore Local Adjustment Presets. You can also make your own adjustment and save it as a preset. You can adjust the Exposure, Brightness, Contrast, Saturation, Clarity, Sharpness, and Color. You can adjust the values of each effect by using the sliders.
Just like in Photoshop, you can adjust the brush settings in Lightroom as well. The brush size, feather, flow and density settings can be controlled by adjusting the sliders below the adjustment settings. If you’re having a hard time brushing in specific areas and you keep on accidentally brushing areas that do not need adjustments you can select Auto Mask and it will confine your brush strokes to those areas that have similar color.
To save your own adjustment preset, first apply the effect and then select Save Current Settings as New Preset in the Effect pop-up menu, name your preset and click Create. The new adjustment preset will then appear on the Effect pop-up.
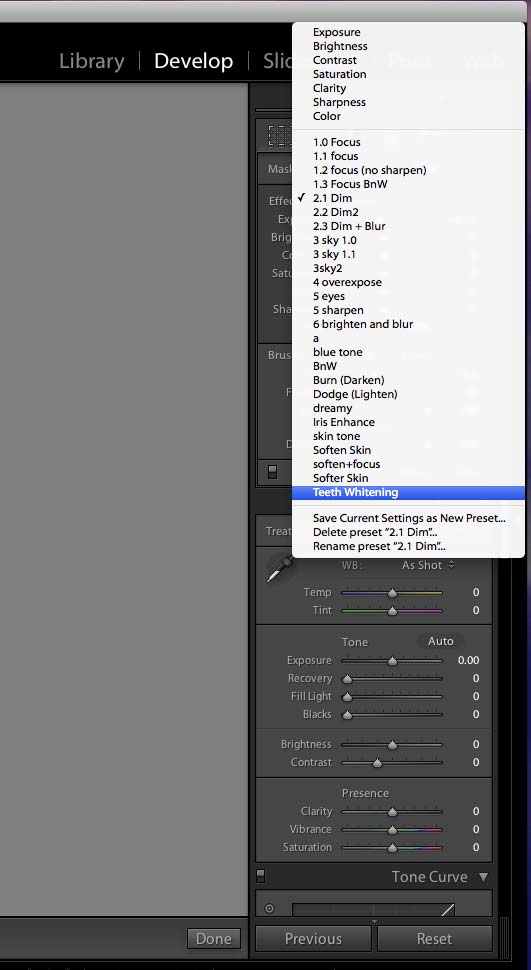
In case you make a mistake you can hit ALT key while brushing on the areas you have brushed to delete or erase the changes you’ve made. The adjustments you have made will not alter the original file of the image you are editing, and when you’re done editing you can go to the Library Tab and Export the photos to a different location.
Here are some examples of photos edited using the Local Adjustment tools:
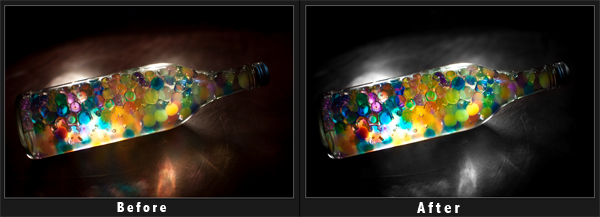
Photo by: Anna Altez
I used the Adjustment Brush tool for this photo. I decreased the value of Saturation and brushed the areas around the bottle thus making it Black and White. I then increased the Saturation and Clarity Slider and brushed the bottle to make the colors more vivid and saturated. Notice that the colored sago have become clearer due to the Adjustments I made.
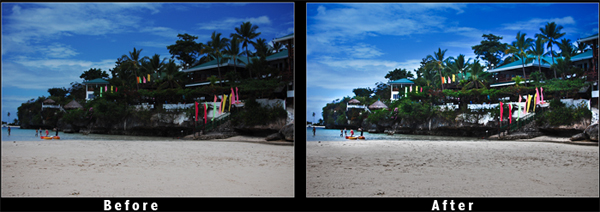
Photo by: Anna Altez
Here I used the Lighten Adjustment brush to make the trees and the houses more visible, I also used the Graduated Filter for the sky.
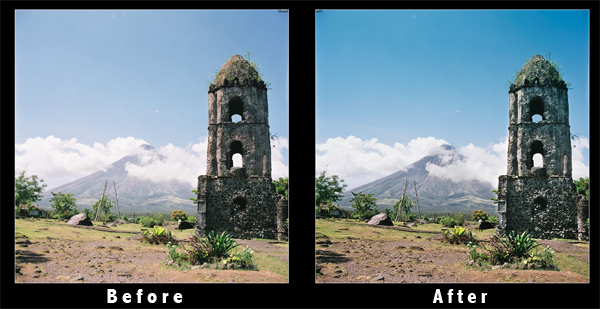
Photo by: Anna Altez
This was a shot of Mayon Volcano. I used the adjustment brush tool so that the volcano becomes more clear and the sky more vivid.


