Tips for Better Basketball Photography
One of the most unique and dynamic sports to photograph is basketball. The fact that the players’ faces are not encumbered by any properties of their uniforms, and the action is close and fast makes it dynamic. Basketball photography can be done effectively with some few tips.
Wide aperture
Your choice of composition and lens is very important as you are normally assigned a specific seat during a game. If it is a full arena, you should think of using a wide-angle lens. To have the best in basketball photography, you should either have a chair that your camera can rest on or use a monopod, and select the widest aperture available (f/2.8 – f/4). A stable rest is crucial as it prevents blurring.
Zooming on subjects
Setting a zoom lens of 70 – 300mm to wide open is the best zooming option if you are sitting a large distance from the action. Try to capture a player’s facial expressions while filling the frame with the same player. To automatically refocus the image on a mobile player in basketball photography, choose continuous focusing mode and make sure the lens’s focus mode is at autofocus (AF).
Capturing action
Use a shutter speed of 1/200s or more and set the mode dial to manual if you want to freeze the action in a bright arena. When necessary, you can increase the ISO to 800 and open the aperture wide (recommended settings for basketball photography are f/1.8 – f/2.8). Interesting parts of the action like a player dunking a ball or the ball being in midair are things you should try capturing. Hold down the shutter button for as long as required and use the burst shooting mode if you want to do multiple shots.
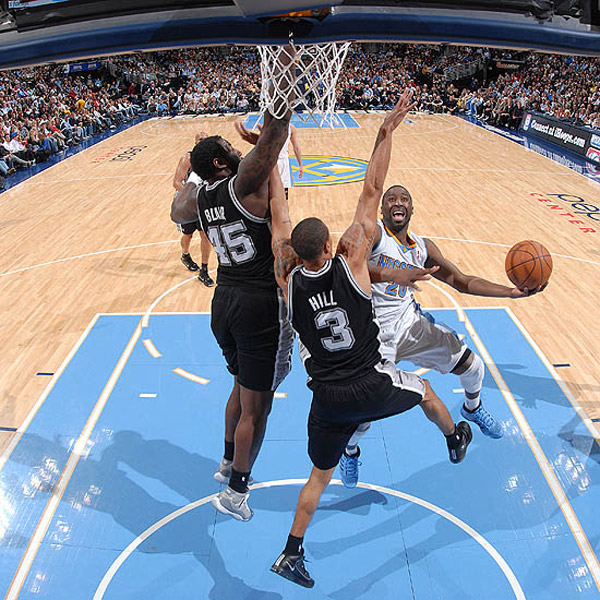
Fantasy Basketball NBA Shot 9 by Rfermin27
Select slow shutter speeds
In basketball photography, motion blur can be created using slow shutter speeds such as 1/15 to 1/60th of a second. Take the shot only after you have properly placed your camera on a tripod and you are holding it still and pointing at moving players. Such a move will ensure you have blurred players with the rest of the photograph being sharp. In basketball photography, you can also use panning whereby you press the shutter while following a player with your lens with a horizontal smooth motion.
Dramatic angles
Spot local talent in high school gyms and ask for permission to take their photos. For dramatic compositions, you will need to use extreme positions. To freeze the explosive action, set the aperture to f/5.6 or f/8 and the shutter speed to 1/250th of a second or more. These settings will also help you isolate events in the court and have a shallow depth. The ladder behind the backboard can be used for getting memorable shots.
Recommended settings for basketball photography
High school gymnasiums mostly use artificial lights that may have some level of flicker in them. To avoid the flicker affecting the quality of your shots in basketball photography, use the custom White Balance setting or leave your camera on Auto White Balance.
Recommended equipment for basketball photography
If you are sitting closer to the action, you may need a versatile 70mm – 200mm zoom lens that will allow you to take wider images showing context as well as portrait shots. Make sure you are using a good DSLR camera that gives previewed images. Such a camera will help you make the necessary adjustments when doing basketball photography.
Conclusion
Basketball photography can be very rewarding as long as you have the right equipment and knowledge on shots. It is important to capture emotions of players during a game. Never forget to make sure your White Balance is set properly due to the varying color temperatures of overhead lighting. With such tips, you can effectively go about basketball photography and come up with world class shots




Thanks a lot for sharing such a great piece of article! I found it a good helpful write-up with a good sound and explanation. Here I have seen some valuable ideas that are definitely helpful for every basketball photographer. Please keep sharing more updates!