Night Photography Tips
Night photography has always fascinated photographers by the awe-inspiring results it can offer. Fireworks, sceneries, multicolored lights, movement and long exposures are some of the subjects covered by night photography. But, unlike daylight when taking photos can be relatively easy, the dark brings with it some limitations and problems. Along with the usual photographic process of choosing your subject, finding an interesting point of view and tweaking your composition, you will have to think of the gear you need, depending on the situation. You will also have to take in consideration issues of white balance, shutter speed, ISO setting and aperture. Cameras are usually set to take photos in daylight and artificial lighting and dark subjects can sometimes be tricky to measure.

The gear for night photography:
In order to get the best results at night, you will need some equipment and accessories.
A Camera:
Most compact cameras have night modes that will enable you to pull out some pretty interesting photos. But these cameras are limited, as you can’t control your exposure time and aperture. In night photography you will find yourself in situations where you need to be in full control over you shot in order to get correct exposures. Thus, digital SLR cameras are more suited to night photography. They allow you to set everything manually, they accept different kinds of lenses and they can be triggered through a remote release.
A Tripod:
You will need to set your camera on a tripod to avoid camera shake in long exposures. Opt for a sturdy tripod, as it can be windy sometimes which can affect your photos. Some tripods offer center posts with a hook where you can hang an additional weight to make the tripod more stable. Make sure that it can handle the weight of your camera and your heaviest lens, though. You don’t want to break thousands of dollars worth of equipment because of a cheap weak tripod.
A Remote Release:
A remote release will allow you to take your photos without having to touch your camera which may cause it to shake and produce a blurry image. You can also use the camera’s self timer to avoid touching the camera at the moment of the taking of the photograph. But, a remote release is crucial in cases of very long exposures using the Bulb mode.
A Flashlight:
As you will be shooting in the dark, you will need a flashlight to light your way and easily move around. The flashlight can also be used to light you subject or to do some light painting. For the latter option, bring some gels with you. You can place them on your flashlight to get different colors from the same source.
Don’t Forget Safety:
It won’t be fun if it isn’t safe. Think of your safety before everything else. Scout the area you intend to photograph during the day to get to know it better and to avoid any dangers that may occur at night.
The Technical Bit:
When dealing with night photography, you will have to take control of what the camera handles well in daylight situations. The main four issues you have to handle are focus, white balance, shutter speed, aperture and ISO.
Focusing:
Most cameras encounter autofocus problems in low light situations. If you intend to use autofocus anyway, try to find a lit up point or an area where there is a clear contrast between two elements to focus on. Otherwise, you will have to set your focus manually which can be more accurate in night photography.
White Balance:
Usually, at night, there are different light sources lighting a scene which produces a variety of colors. You can get satisfying results if you leave your camera on auto white balance. But if there is a light source that is more dominant in a scene, it is more appropriate to adjust your white balance in accordance with that light source.
Shutter Speed, Aperture and ISO:
These are the elements that control whether you get a proper exposure or not.
If you are taking night shots with a hand held camera you will need fast shutter speeds to avoid camera shake and vibration. But to get properly exposed shots with a fast shutter speed at night, you need to use the widest aperture you can get from your lens and set the ISO high enough (up to 3200 or more with some cameras). For slow shutter speeds, use a tripod or put your camera on a surface that can keep it steady during the exposure.
Aperture controls the depth of field. Thus using a wide aperture will result in a shallow and limited depth of field. In night photography and especially in night sceneries, it’s better to opt for smaller apertures (between F8 and F11) to get a good focus range.
The Aesthetic Bit:
As with any other form of photography, night photography conforms to the norms and rules of composition, balance, colors, etc.
Go to the place you are shooting during daytime and try to find interesting spots and compositions. When composing your photo try to find patterns and lines leading to a lit up subject. Water reflections can give you magnificent results when shot at night. Street lights, neon lights and windows will reflect their diversified colors on the water , producing a beautiful sights which you can turn into beautiful pictures.
One of the best moments to take night shots is at dusk. The lights in cities are usually on and you can see some color in the sky. This combination will create a sense of balance in the image and will make the photos more vivid.
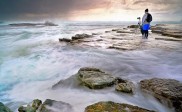
Don’t hesitate to use long exposures. It is the only way you can capture photos of fireworks, lightening, light trails, etc. But, always use a tripod and preferably a remote release to make sure you succeed in getting the long exposures right. You don’t want to wait all that time only to find that all you got was a blurry photo.
Night photography requires a lot of practice, patience and time. But, the results are totally worth it.
Some Examples of Night Photography:

Photo By Yassine Hakimi

Photo By Yassine Hakimi

Photo By Yassine Hakimi
More resources


This was an interesting read, thank you
I do alot of work with night & water. You can get some amazing images on time lapse using moving water at night time. I have been very happy with the results of some of my efforts.
Thank you for your nice comment, I have visited your website and i am really impressed with your work, good job 🙂
Great work, I especially like the long exposure shots.
I love the nightshots and tips , Thx
Night photography is my favorite!!
Thank you for your great tutorial and photographs. I love night photography and especially the red lights of the cars.
Because cameras have the ability to accumulate light over time, night time photographs can seem brighter than they do to our eyes. This means that details are revealed that are hidden details from view because of the limitations of the light gathering ability of our eyes. very usefull tips
i have same tips here about how to revealed colors of night for Details and Moods
http://photograpyreview.blogspot.com/2011/09/colors-of-night-details-and-moods.html