HDR Photography Simplified
Ever noticed that there are instances when the captured image seems different from the actual subject you photographed, it may have too much shadows or too much highlights? If you want to completely capture the natural scenery you’re seeing then HDR photography is the right technique for you.
HDR or High Dynamic Range photography is an advanced technique in photography that allows photographers to play with the dynamic range of an image’s exposure. HDR photography lets photographers show a larger range of tonal details in an image. It enables photographers to create images that are as accurate (as possible) as the real scenery they are trying to capture. There are three things that will make and ordinary photo into an HDR image, the 3s: sunlight, shadow and subjects. The HDR technique solves the incapability of cameras to show both the light and dark areas of an image compared to what the human eye sees.
How HDR Photography Started
The history of HDR photography dates back to the 1930s. Surprisingly, HDR photography was intended for capturing images of nuclear explosions. It was Charles Wyckoff who developed HDR photography and was responsible for the cover of the 1940s Life magazine showcasing nuclear explosions.
A deeper and more scientific approach on HDR photography was made in the early 1990s by experimenting on two photography elements; tone mapping and bracketing. A few years later a computer graphic researcher named Paul Debeyec applied the scientific studies and mathematical theories on HDR photography. He combined a couple of images with different exposure levels and successfully produced an HDR image.
Due to technological advancements HDR photography is much easier to do nowadays. HDR photography is so easy that it has become very popular not only among professional photographers, but also among hobbyists. Another reason why it’s well-liked is that HDR photography has an astonishing and artistic effect, especially when it comes to landscapes and architecture.
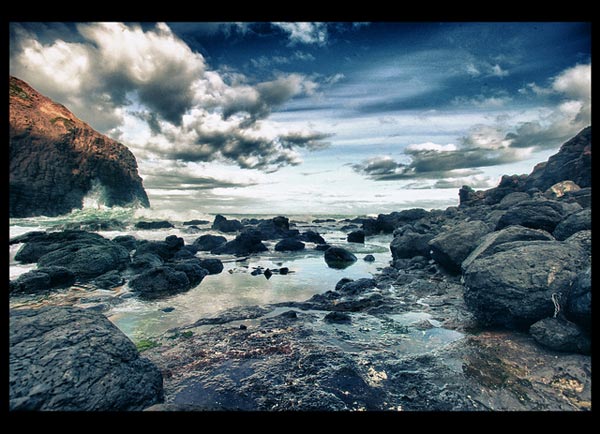
Photo by HARRY NG
How to Achieve Amazing HDR Photographs
HDR photographs are achieved by taking a couple of shots of the same subject at the same angle with different exposure levels by using exposure bracketing, and then merging the images into one single image. Any camera that allows its users to adjust the exposure manually can be used in HDR photography. Those who haven’t tried HDR photography before may use the following settings: Set your ISO to 200, set your camera to Aperture Priority and take three photos with exposure settings as EV 0, EV-2, and EV+2. The more differently exposed photos you have, the better.
Most photographers prefer to use tripods in doing HDR photography so as to maintain the angle and the positioning of the camera. It is also advisable to take photos in RAW image format (.CR2 for Canon users and .NEF for Nikon users), because it’s a lossless format compared to JPEG, which compresses the photos.
There are several cameras that have a built-in HDR feature, which automatically merges the photos that produce an HDR photo. Those whose cameras don’t have HDR features use different softwares for post-processing the images and merging their photos.
The latter versions of Adobe Photoshop (Adobe Photoshop CS3 to CS5) have an option that will enable its users to merge photos and make HDR Photographs. Just do the following steps:
1. Click File > Automate > Merge to HDR

2. Load the images to be used for the HDR Image and click OK
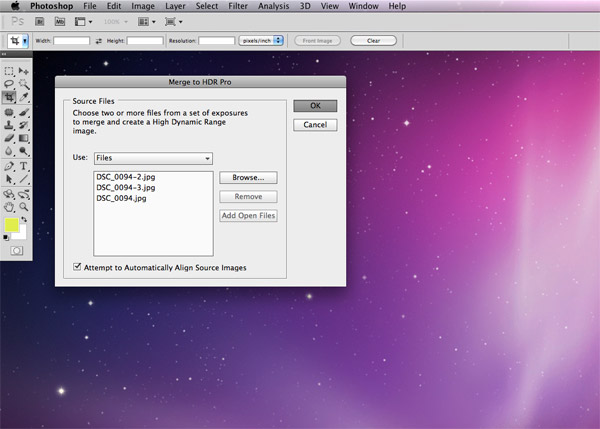
3. Select 32-bit/channel and tick Remove Ghosts
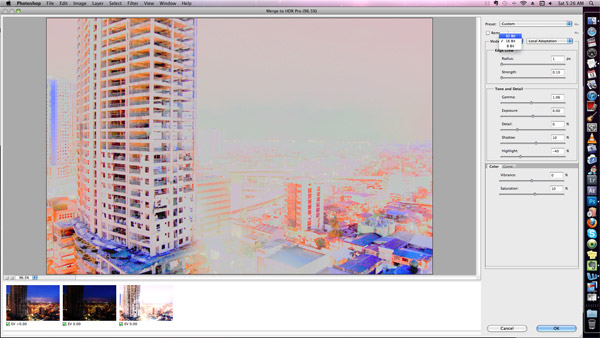
4. Click Image > Mode > 16-bit/channel
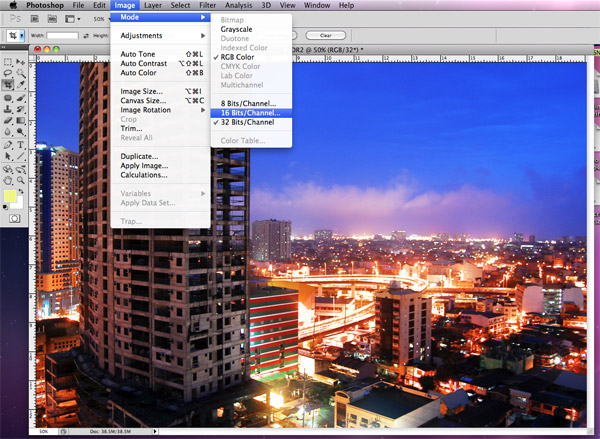
5. You can now do the tone mapping. Adjust the settings depending on how you want your HDR photo to look.

Here’s a list of other softwares you may use in HDR Photography aside from Photoshop:
- Artizen HDR
- Dynamic Photo HDR
- EasyHDR PRO
- Photomatix Pro
- Qtpfsgui
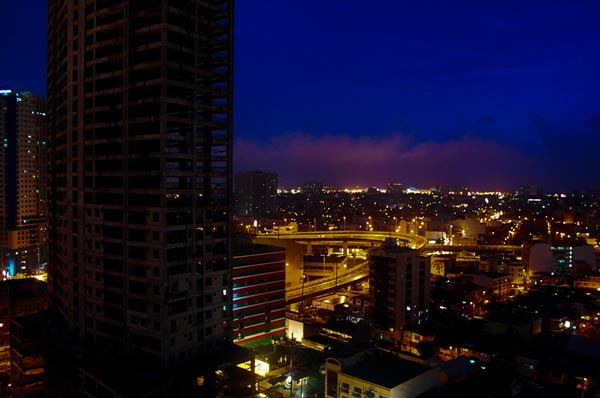
Normal Photograph:
HDR Photograph:
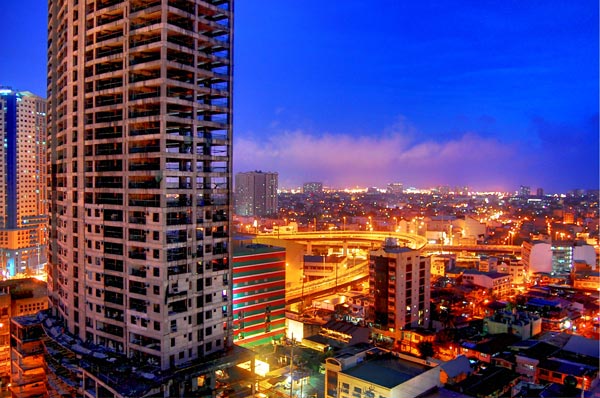
Photos by: Anna Altez


I take it you need something called “HDR pro” for photoshop? What is it, and where can I get it? The window I get after selecting the photos and clicking OK is completely different from the one shown in the article. There is no option to “Remove Ghosts”, I can only adjust the white point and select 16 or 32 bits. I also don’t get the HDR toning window.
Hi JP!
What version of Photoshop do you have? The HDR pro is only available for CS5 versions. Also there’s no Toning options for the CS4 version.
I have been using Photomatix Pro which in my opinion is the best HDR software on the market. Also, I believe that HDR photography is the most interesting and enjoyable and artistic avenue of photography that I’ve tried. The photos it produces are stunning to say the least.
Too much post processing!!