How to Take High Key Photos
High key is a lighting technique which produces images that are bright and not too contrasty. High key photos are characterized by the dominance bright tones and the lack, if not absence, of shadows. The histogram of a high key picture will be condensed on the right side (bright tones) but without loosing too many details of highlights.
High key is best achieved in a studio environment with different flash units. However, you can achieve this effect with whatever you got if you keep in mind a few points. I succeeded in achieving a pleasant high key effect, using only my compact camera and the available light.
So when shooting high key images you will need:
– A camera that allows you to overexpose your shot, or a camera that can be set on manual mode. Basically, any camera allows for exposure compensation and overexposing the photo won’t be a problem.
– Available light that is strong enough for you take overexposed images at reasonable shutter speeds.
– A bright neutral background. A white wall which reflects the available light will be ideal.
– Post-processing software, such as Photoshop or Gimp to be used especially for shots taken in available light with compact cameras. A little bit of editing will make the high key effect more eye-catching.
Taking High Key Photos in a Studio:
The High key technique is great for taking photos of light colors against a bright background. It works well for shooting portraits, still life, and product photos. In order to shoot a high key image, you need to use soft diffused lighting to cover your subject without casting any shadows (a big soft box will do the trick). You will also need to overexpose your background. You can use two light sources directed at a 45° angle from each side and you would set them to 2 stops higher then your softbox to get a bright an neutral white background.
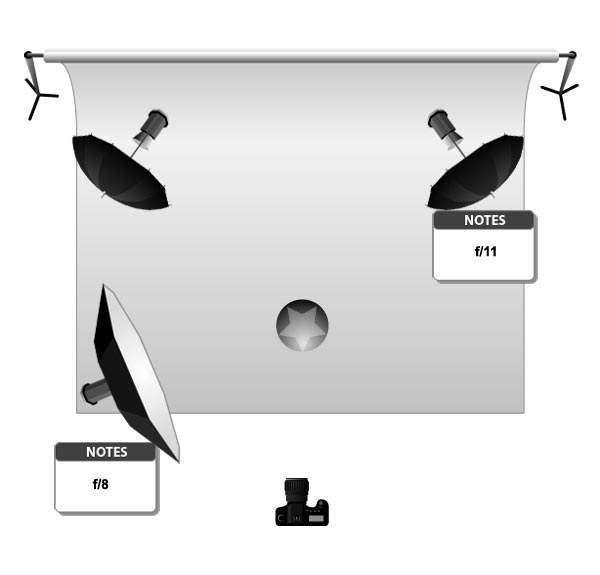
Of course, the aperture set on your camera would coincide with the one set on your softbox.
If you are shooting high key studio portraits, pay attention to your models make-up, as it will make all the difference. Usually, a make-up that is full of colors will give you the best results because it will create the contrast lost by the choice of this kind of lighting.
Also, try to always diffuse your light (umbrellas, softboxes…) to make sure you get rid of any unwanted shadows.
Finally, a little bit of editing might help. Just, some adjustment on levels and curves might give you impressive results.
You can still make high key photos if you own only one light. You can use one big softbox set above your model which will light both the subject and the background. But, Make sure to overexpose your shot by 1 or 2 f-stops and also to set the subject, the light and the camera on the same axis to assure the best results.
Taking High Key Photos with Available Light:
You can take high key photos even if you don’t own any studio lights or professional cameras. In order to achieve this effect with available light and using a compact camera, you need to find a spot where the light is diffused (a curtain or an overcast day). You also need to find a background that is bright (ideally white) and capable of reflecting light. Then all is left is to take your photo overexposed and to finish the effect in post processing. The reason behind overexposing the shot is that with the light hitting the subject and the light reflected from the background the camera meter will tend to underexpose the shot to get a correct exposure, that’s why you need to over expose by a stop or two in order to get a shot devoid of high contrasts. After taking the shot, you need to complete working on the effect in an editing software. Depending on how well you managed to get the high key effect in the shooting stage, the editing will vary. It can consist of some minor contrast and brightness adjustments or it can be more complex and requiring several effects applied.
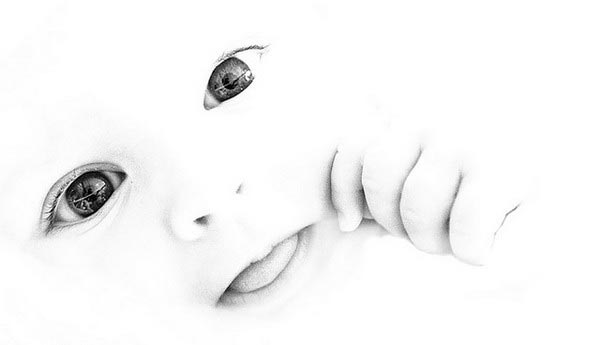
Example:
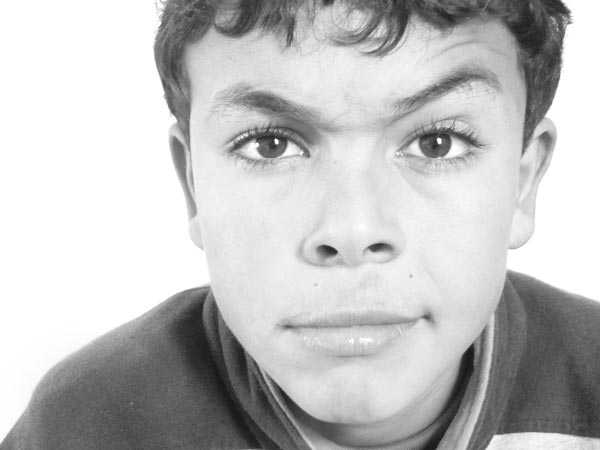
Photo by Yassine Hakimi
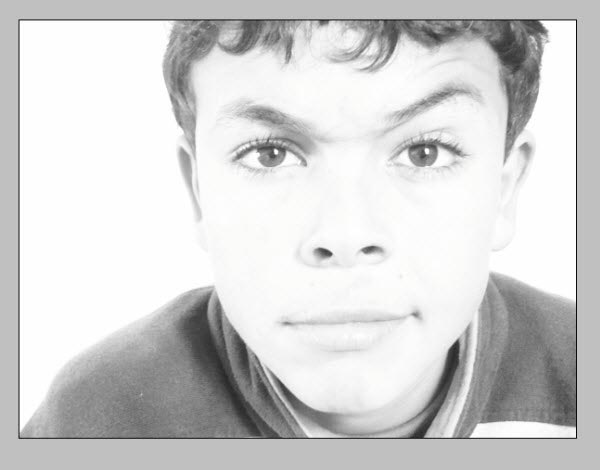
For this image, I used the available light diffused through a window curtain and reflected on the background (white wall). I was using a compact camera, so I set it on an exposure compensation of +2 EV, i.e. the shot was overexposed by 2 stops. The effect I got was quite pleasing as it came from the camera, but with some more editing it looked even better.
I opened my photo in Photoshop SC2,
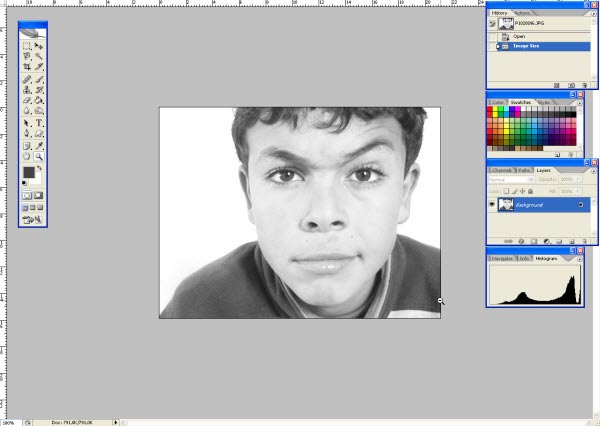
Then, in the channels tab I selected the RGB channel while pressing the Ctrl key on the keyboard. This created a selection of the shadow areas of the photo.
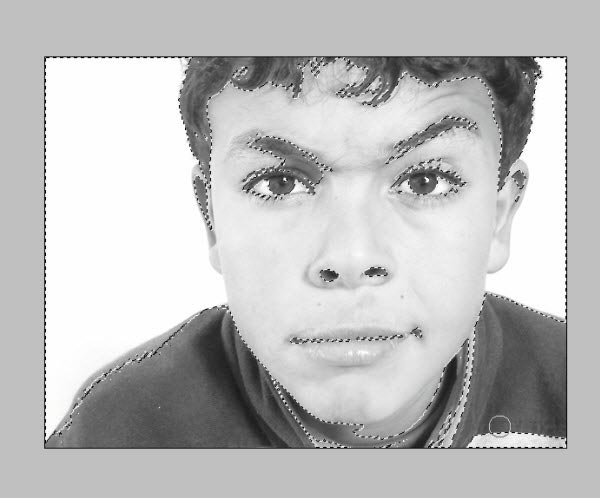
After that I created a new layer via cut (Layer > new > Layer via cut) and I deleted it (right click > Delete layer).
After the last step, all the shadows that were visible before were deleted and the high key effect became more consistent.
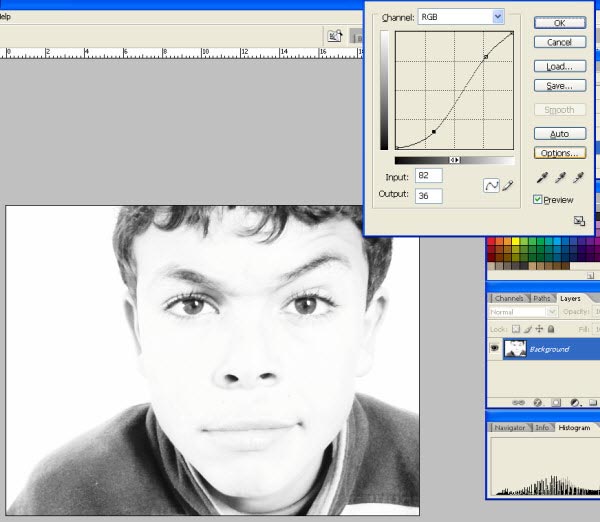
All I had to do after that is to bring back some of the contrast in the areas of the eyes, the eyebrows and the hair. So, I applied a nice S shaped curve to the photo (Image > adjustments > curves).
Finally, I selected the burn tool; I set it on shadows with an exposure of 9% and burned the areas of the eyes and the hair to get my final result.
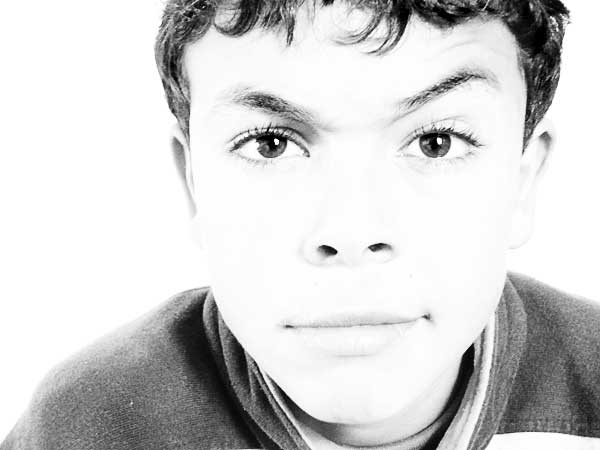
High key images can produce a very pleasant effect while being relatively easy to achieve. All you have to do is to keep in mind the basic steps needed to produce such images.
– use diffused light.
– overexpose your image.
-concentrate on the interesting features of your subject when composing.
– find a bright neutral background.
– do some post processing to get the best results.
Here are some other examples of high key photography:
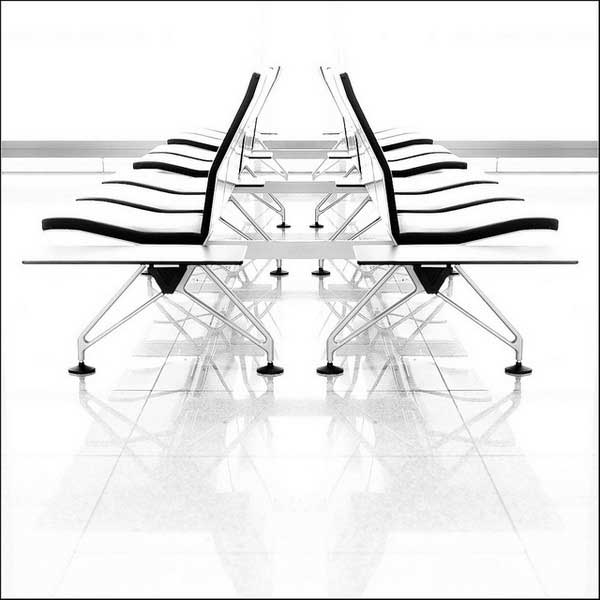
Photo by Davide Rizzo


Great….something really new for me…thanks